
We had a graphic designer called Ken Coleman who came to our school for a couple of days to help us to achieve the desired look of our digipak. It was a great experience to have him as he showed us very useful and helpful tips on how to get our desired looks for our work.
This image that we got online which some one has created on Photoshop to look like an image under water.
Ken showed us how to the tools on Photoshop to make the digipak look professional and look like something which could be produced in the music industry.
This image that we got online which some one has created on Photoshop to look like an image under water.
Ken showed us how to the tools on Photoshop to make the digipak look professional and look like something which could be produced in the music industry.

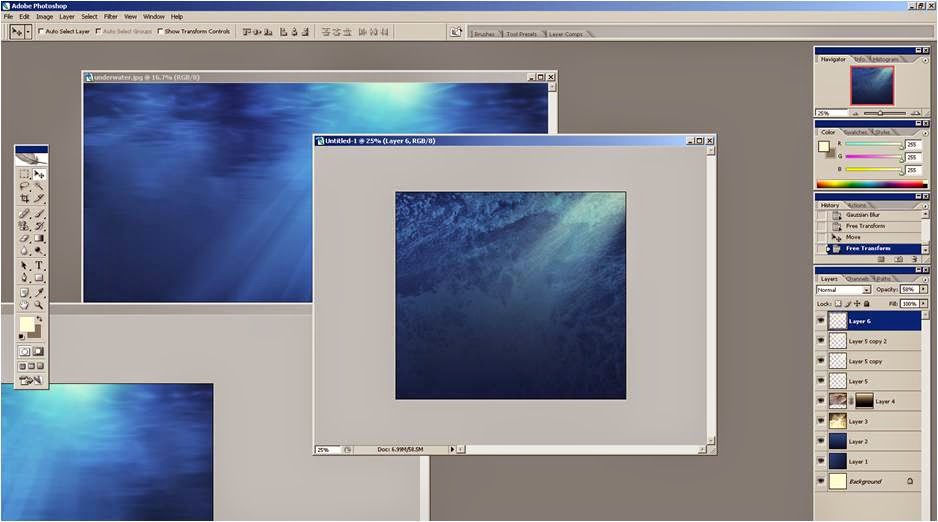


We created this effect on Photoshop, by merging photos of water of that we had taken, layering a blue gradient on top. we then edited the contrast and lighting to make it look as realistic as possible.
We made sections with a white gradient and blurred these to give the effect of light shining into the water, and added them to the top right corner.
We layered the picture of the girl on top, and changed the colours of the image to make her look underwater and to blend her with the picture so she didn't stand out to much. We did this by adding a slight blue tone, representing her looking cold as well.
We then found bubble tools from online (the same as how we found the hair tools), which we played around with to make the girl look like she is floating in the water.
No comments:
Post a Comment